Forum Replies Created
- AuthorPosts
 EasySIGNParticipant
Hi Kurt,
This issue can appear when the software is closed before it has completely started and the license release has not been completed. To avoid that you have to wait before you can use the EasySIGN license on your main computer just restart the EasySIGN software on the second computer and close it after the software is completely started and fully functional. The license will be released from your second computer and is available for usage on your computer afterwards.
Let’s make things easy!
Wilbert at EasySIGN
EasySIGNParticipantHi Mia,
We have entered a new feature to automatically convert the Print and Cut line into a hairline. In your case this is set to a Magenta hairline.
You can switch this feature off under the menu File > Settings > Export. Just untick the button “Including special lines”.
In that case the Print and Cut line will no longer be converted into a Magenta hairline when you export the EasySIGN worksheet.
Wilbert at EasySIGN
EasySIGNParticipantHi Mia,
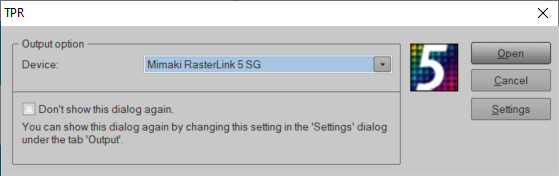
Do you use the TPR connection (yellow button) in EasySIGN to Print the file to Rasterlink?

Wilbert at EasySIGN
EasySIGNParticipantHi Mia,
How do you print the file?
Do you use the “yellow button” (Third Party Rip connection) in EasySIGN? What is your RIP software that you use?
Wilbert at EasySIGN
EasySIGNParticipantHi Mia,
Thank you for the EasySIGN worksheet. The Print and Cut line is placed on the round off effect on a square. This square has a black line colour which is printed. When you remove this this line colour than this line will no longer be printed. The Print & Cut line remains available for cutting the stickers.
Let’s make things easy!
Wilbert at EasySIGNEasySIGNParticipantHi Mia,
This is not supposed to happen. Can you send us the EasySIGN worksheet so we can check the file with the print & cut line?
Let’s make things easy!
Wilbert at EasySIGNEasySIGNParticipantHi Richard,
I don’t get a crash, I just get warning regarding insufficient memory when I try to use this vectorization tool. Therefore we developed the vectorization 2 feature as it creates fewer nodes and gives better results especially when working with lower resolution bitmaps.
Have an easy day!
Wilbert at EasySIGNEasySIGNParticipantHi Richard,
Thank you for sending the EasySIGN document.
We can do a successfull vectorization usign the vectorization-2 feature. However the result is not suited for cutting as the original bitmap is not clear enough to create sharp vectorlines. The bitmap contains plenty of small sized textlines (hight of about 2 mm).
In case possible we recommend to use the orinal text document and copy the text into the EasySIGN text editor using the original font. You will be able to scale the text to required output size.
Have an easy day!
Wilbert at EasySIGNEasySIGNParticipantHi Richard,
Thank you for the explanations.
Please send the EasySIGN document to: support@easysign.com
Have an easy day!
Wilbert at EasySIGNEasySIGNParticipantHi Richard,
Thank you for your message. I am sorry to read that you are experiencing trouble with the vectorization. I will be happy to help you.
Can you please send us a bit more information?
– Which version of EasySIGN are you using?
– Which vectorisation method do you use and what are your settings?
– Can you send us a copy of your EasySIGN worksheet?Have an easy day!
Wilbert at EasySIGNEasySIGNParticipantHi David,
When you import an Illustrator file form the clipboard and paste this file as PDF in EasySIGN then EasySIGN will open automatically a new worksheet. This is to be able to maintain (in case available) the layer information.
We recommend you to use the compatibility feature as available within EasySIGN. In that case you can choose to export or open a file from Illustrator in EasySIGN. Read more about compatibility.
Have an easy day!
Wilbert at EasySIGN
EasySIGNParticipantHi Antoine,
The ribbon-interface is no longer supported. So some features can be missing. We recommend you to work with the standard menu interface in EasySIGN.
Have an easy day!
Wilbert at EasySIGN
EasySIGNParticipantHi Jan,
Thank you for sharing your ideas.
We have placed the import of svg files on our list for future developments of EasySIGN features.
Have an easy day!
Wilbert at EasySIGN
EasySIGNParticipantHi Mihai,
You can download the EasySIGN 32 bit version for the website at download.easysign.com,
Just select “or download the 32 bit version” and the download will start immediately.
After download and installation you can logon to EasySIGN to activate the software.
Have an easy day!
Wilbert at EasySIGN
EasySIGNParticipantHi André,
Please install the latest EasySIGN 2020 version as available for download on the EasySIGN website at download.easysign.com.
This EasySIGN version contains the compatibility feature for Coreldraw 2020.
Have an easy day!
Wilbert at EasySIGN
EasySIGNParticipantHi Petr,
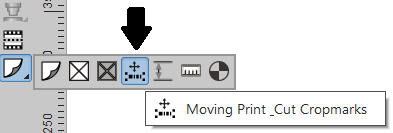
You can change the position of the allignment cropmarks manually with the cropmark tool as available within the EasySIGN toolbox.
Have an easy day!
Wilbert at EasySIGN
EasySIGNParticipantHi Carlos,
EasySIGN offers a logon license. Therefore you can install the EasySIGN software on two computers. You will open the EasySIGN software when you logon with your account. When you have a single EasySIGN license you can logon on one PC. When you logout you will be able to logon to EasySIGN on another PC.
In case you want to work with EasySIGN on two computers simultaneously, two EasySIGN licenses will be required.Have an easy day!
Wilbert at EasySIGN
EasySIGNParticipantHi Mitesh,
When your EasySIGN 2020 software on your office PC is closed the EasySIGN license will be available to logon on your PC at home. So you can install the EasySIGN 2020 version on your PC at home and use your logon and password to start your EasySIGN 2020 version.
Have an easy day!
Wilbert at EasySIGN
EasySIGNParticipantHi Kate,
The first step is to open the scanner features. This can be done under the Miscellaneous settings (menu: File > Settings… > Miscellaneous). Set the Twain to “WIA” instead of the default setting “none”.
Now the grey scanning features will be enabled. Now you can select your scanner (menu: File > Scan > Select source…) and set you scanner. The next step is to a acquire your scan (menu: File > Scan > Acquire…) or to use the scan wizard (menu: File > Scan > Wizard…) to scan the document.
Have an easy day!
Wilbert at EasySIGN
EasySIGNParticipantHi Katryn,
You can easily add a new colour to your color palette. In your case you are using a 100% Magenta hairline as a cutting line. You can create color for your palette bij choosing the “Add spot color…” feature as available under the menu File > Colors > Add spot color…
Select the CMYK color model and put the Magenta bar at 100% (the other colors should be at 0%) and press add to enter the name (eg CutContour). The Color will be added to your palette automatically. If you do not see this immediately please scroll further in the palette with the tool button on the right side of the color palette.
Have an easy day!
Wilbert at EasySIGN
EasySIGNParticipantHi Steve,
You can use the transparacy of the PNG file as a mask for the bitmap. The steps are as follows:
1. Import the PNG file into EasySIGN
2. Select the PNG file and convert the tranparency to mask (menu: Bitmap > Transparency > To Mask)
The transparency is now masked around the bitmap shape instead of the square shape.
Have an easy day!
Wilbert at EasySIGN
EasySIGNParticipantHi Ruth,
Please check if the latest version of the EasySIGN software is installed on your computer. You can download the actual EasySIGN version from the EasySIGN website at https://www.easysign.com/software/download/
Have an easy day!
Wilbert at EasySIGN
EasySIGNParticipantThe steps are as follows:
1. Draw your design and select the node(s) that you wat to give a specific radius.
2. Select the drag tool in the EasySIGN Toolbox (the black triangle in the toolbar on the left side of your worksheet) to open the node editing toolbar
3. Select the button “Smoothen corner at a specified radius” within the node editing toolbar
4. Enter the radius and press okHave an easy day!
Wilbert at EasySIGN
EasySIGNParticipantWe have added a support ticket to resolve this issue. You have received an email with further information.
Have an easy day!
Wilbert at EasySIGN
EasySIGNParticipantBefore you can use the workflow some things need to be specified. You need to know which barcode system you want to use and where the hotfolder of the Summa Cutter Control software is located. The output port of your Summa cutter within the EasySIGN plotter driver needs to be set to the “SummaCutterControl” to be able to transfer the files to the Summa Cutter Control software. Also check which version of the Roland Versaworks software you have in order to select the correct TPR connection.
The workflow has the following steps:
1. Create your design in EasySIGN
2. Set the Cropmarks for the Summa Barcode (Menu View > Settings > Cropmarks)
3. Print the worksheet with Roland Versaworks (simply select the TPR connection with Roland Versaworks under the “yellow button” as available with the “Standard toolbar”
4. Cut the EasySIGN worksheet by plotting the file to the Summa Cutserver software from EasySIGN.
5. Place the printed sheet (included artwork and barcode cropmarks) on your Summa plotter when it is finished printing.
6. Send the barcoded plotfile to your plotter from the Summa Cutter Control software.Have an easy day!
Wilbert at EasySIGN
EasySIGNParticipantHi Willem Jan,
When you open the PDF file in EasySIGN as vector data you will see that the PDF file contains many single line curves. In order to create a mask, these lines need to be converted to one single object which can be used in EasySIGN as a mask afterwards. So in this case we recommend to select the lines which need to be used as a mask, and then use Arrange > Combine or CTRL + L
As the PDF files contains many curves this can be time consuming depending on the number of curves that need to be used as a mask. Alternatively, you can check if the PDF file can be exported from the original design software as a combined vector object. This may save time in creating the objects which will be used for masking.
Have an easy day!
Wilbert at EasySIGN- This reply was modified 5 years, 11 months ago by
 EasySIGN.
 - This reply was modified 5 years, 11 months ago by Paul Schoofs.
- This reply was modified 5 years, 11 months ago by Paul Schoofs.
- This reply was modified 5 years, 11 months ago by Paul Schoofs.
EasySIGNParticipantHi Ruth,
The position of the toolbars will be saved automatically when closing the EasySIGN software. The toolbar will automatically open op this position when re-opening the EasySIGN software.
Have an easy day!
Wilbert at EasySIGNEasySIGNParticipantHi Ruth,
You can add colors to the color palette (on the bottom of the EasySIGN page) by selecting the option “Edit color-table” as available in the “Fill color” menu within the EasySIGN Toolbox (on the left side of the EasySIGN worksheet). The next step is to select the required color table, in the case the “Avery 700 series” and select all available colors (Shift + left mouse button) to add all colors to your color palette.
Have an easy day!
Wilbert at EasySIGNEasySIGNParticipantHi Ruth,
You can set the space within the text mode bar an press on the button “Save settings as default” (positioned right of the yellow star button within the EasySIGN text mode bar). The saved settings will then be the standard settings.
Have an easy day!
Wilbert at EasySIGN- This reply was modified 5 years, 11 months ago by
- AuthorPosts